Showing posts with label digital imaging. Show all posts
Showing posts with label digital imaging. Show all posts
Saturday, April 25, 2009


Friday, September 26, 2008
Wednesday, May 14, 2008
Is It a Miniature Model or the Real Thing? Introducing the "Fake Tilt-Shift" Effect
Got this from Chuck Green's ideabook...
The next time you see a photograph of a tiny little, toy-like model of a "real" scene, look again. It may not be a model at all, it may be the real thing edited using the "fake tilt-shift" effect in Photoshop ("real" tilt-shift is accomplished using a camera lens by the same name). The effect is achieved by changing the depth of field (among other things).
 by yongfook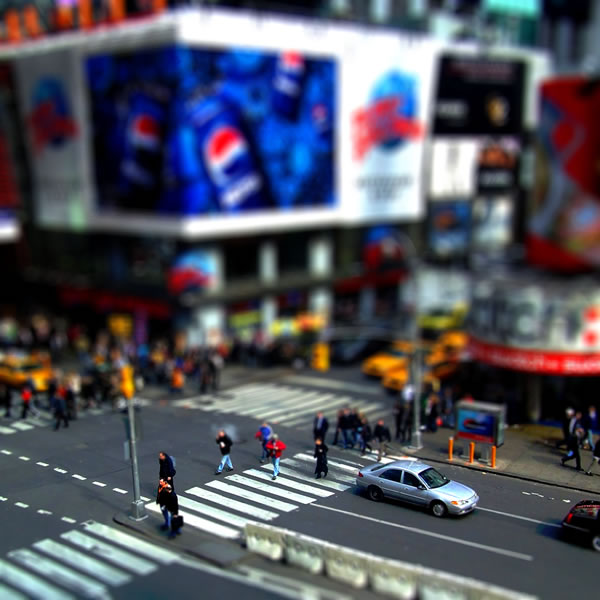
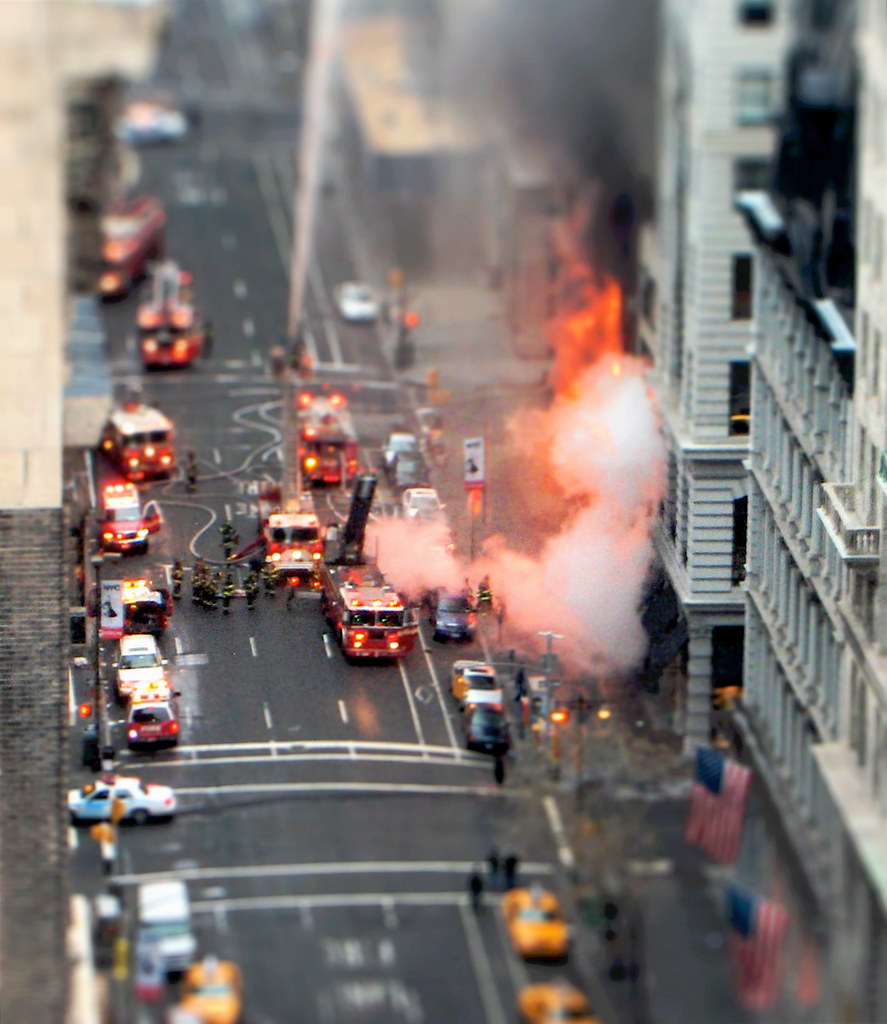 by automatt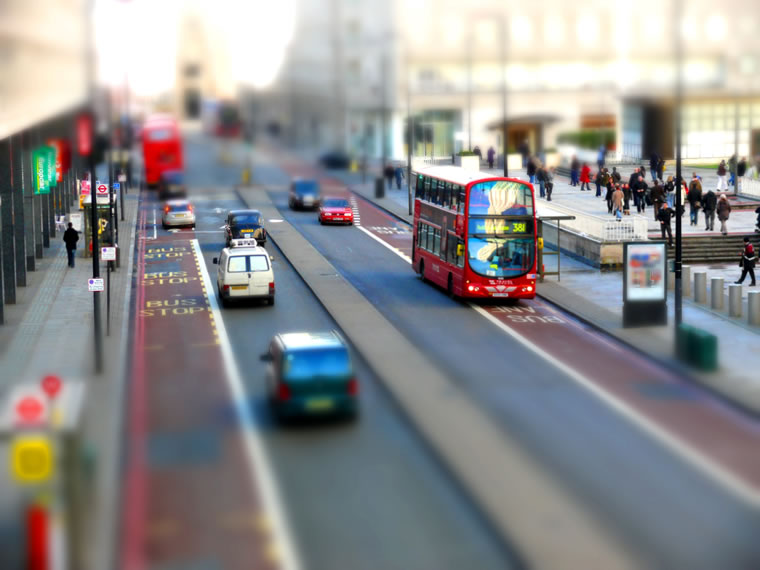
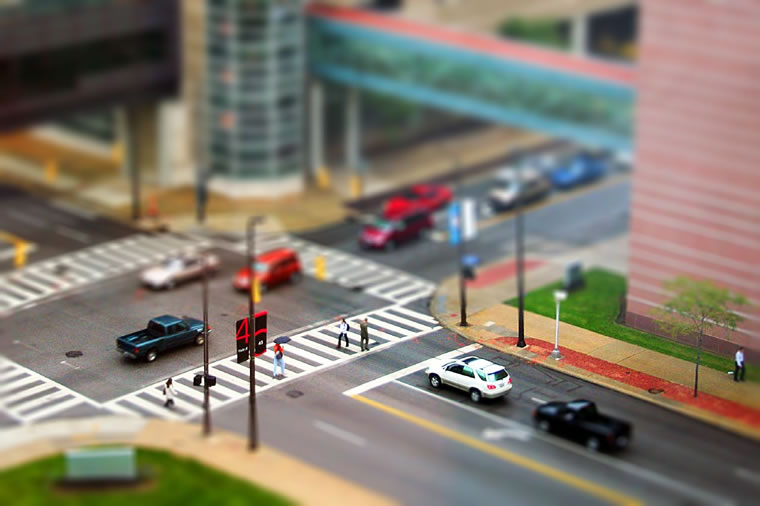
 by yongfook
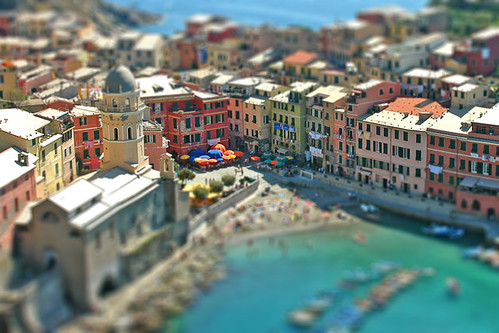 by buteijn
Here are some links to tutorials:
tiltshiftphotography.netrecedinghairline.co.uk/tutorials/fakemodel/
Creating Fake Miniatures
Create a Faux Tilt Shift Effect in Adobe Photoshop Tutorial
Tuesday, May 6, 2008
Dynamic Photo HDR
 Another great HDR software you should try is the Dynamic Photo HDR by Media Chance.
It features cool capabilities such as manual alignment and anti ghosting masking. It also has great settings/methods for tone mapping among others.
Watch this short video about the more advanced Dynamic Photo HDR features in their latest version (v.3) which includes Light Tuner, B/W Mixer, Color-Correction, Match Color, Batch Processing and more:
Friday, May 2, 2008
PROJECT 2 (DI): SUPER WORLD RECORD OF...
This idea was inspired & taken from the book Visual Literacy: A Conceptual Approach to Graphic Problem Solving
The challenge is to illustrate, through PHOTOGRAPHIC DIGITAL IMAGING, a world record of any fact, statistic, deed, or achievement, in any field or subject area.
Consider the natural world, outer space, bizarre and outrageous stunts, challenging exploits, great sports accomplishments, or occurences that are ridiculous, provocative, or shocking.
Tuesday, April 22, 2008
"Multi-Expose" by XP2007
 "Seven Kinds" by xp07 Kevin Winaldy (04)
 "Evalagus" by xp07 Yohan Ariel (04)
 Untitled by xp07 Heru Wibowo (04)
Cartoons Untooned
I got this from trendhunter recently.. The artist used various textures of human skin and pieces of various faces to compose the image. The result is frightening impressive. Take a look at the making process of Jessica Rabbit below.

 Human cartoons are realistic interpretations of famous cartoon characters. In this case, we have Homer Simpson, Mario, and Jessica Rabbit in the flesh.
The artist, who goes under the name Pixeloo, writes on his website, “There isn’t really a strong reason I’m keeping this anonymous, I just kinda decided before I started that that’s how I wanted to do things. I work with Photoshop almost daily in my profession. I don’t feel like I get to have much fun with it lately though and this is my outlet.” 
Thursday, April 17, 2008
How Will You Look in Four Years (When You're President)


I got this interesting "exercise" from popphoto.com where each candidate took about four hours of retouching. To mimic the ravages of time, they did the following:
- Used the Burn and Dodge tools to deepen wrinkles and paint in age spots.
- Cloned the eyebrows and moved them lower.
- Used the Liquify filter to hollow out cheeks, make jowls, thin out lips, and enlarge ears and noses.
- For Clinton and Obama, brought in forehead wrinkles from separate photos and used the Match Color tool to blend them in.- Cloned the eyebrows and moved them lower.
- Used the Liquify filter to hollow out cheeks, make jowls, thin out lips, and enlarge ears and noses.
- For Obama, painted in gray hair on top of his current hair; for Clinton, desaturated with the Sponge tool to make her grayer.
Then another usage of these public figures' faces with digital imaging I found in this really smart ad, coming out on perfect timing, utilizing the moment.

This reminded me of another DI exercise of blending faces to create virtual models or faces or beings, which creates something that also has surreal qualities to it. One of the samples of this process can be seen with the works of LA photographer Caesar Lima seen below. You should check out his blog, too, which shows lots of ads utilizing the powers of photography & digital imaging.

 Photography: Caesar Lima, Digital Imaging: Felipe Silva, Client: Sebastian International, Durso Design
Monday, April 14, 2008
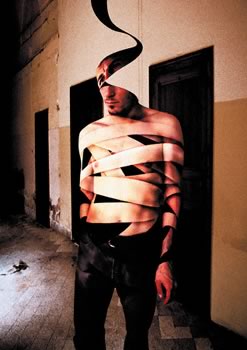
Works of Tetsuya Tamano
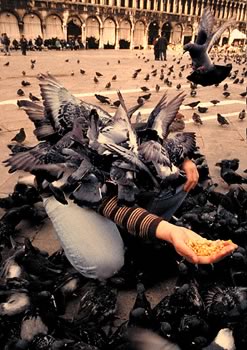
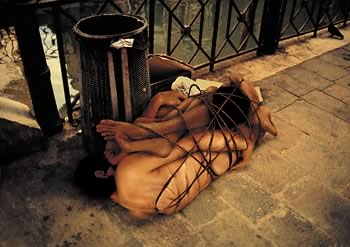
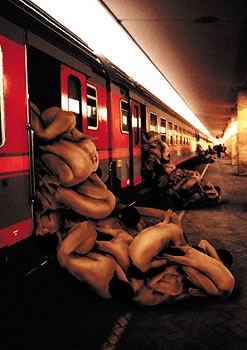
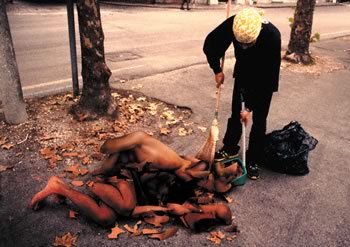
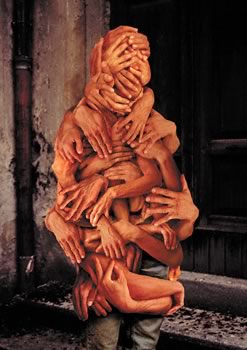
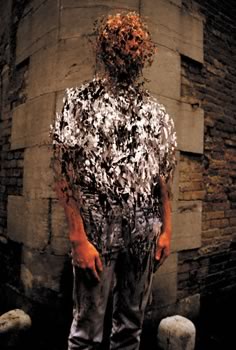
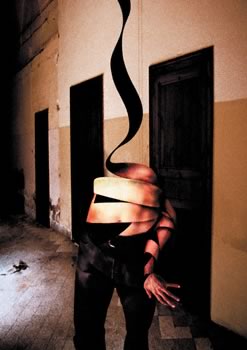
Here are some samples of the work of Tetsuya Tamano.
Tamano Tetsuya developed this body of work during his residency at Fábrica, Benetton’s communication research and development centre. When asked to develop a visual project to depict his view of contemporary society, Tetsuya came up with these strong and often disturbing images; he worked using digital technology, so as to better express his world views, and in keeping with Fábrica’s philosophy, in its role as an applied creativity laboratory (its name comes from the Latin word meaning workshop), of experimenting with new forms of communication.
Wednesday, April 9, 2008
PROJECT 1 (DI): SURREALISM


The first Digital Imaging Project is to create a surrealist image that has to do with the human condition. It's HUMANITY as the big theme and it must contain elements of a human being and his/her surrounding, environment, nature, civilization, social/cultural condition. Find ideas from your dreams, fantasy, songs, poetry, literature, art. A good surreal-photographic image should give one or more of these feelings:
- dreamlike (melancholic, horror,...)
- illogical (proportions, placement,...)
- unexpected (juxtapositions, combinations,...)
- absurdity
- element of surprise
- liberate imagination
At the top of this post are a couple of books for reference.
Other references you could find with the works of Salvador Dali (paintings), Rene Magritte (paintings), Alessandro Bavari, Maggie Taylor, and Domen Lombergar among others.
To see how DI has helped many ads visualize what they really want to communicate photographically, surf on to:
- Top 50 Shockvertisements - Controversial Ads (SUPER GALLERY)
- The Arab Aquarius blog
- dreamlike (melancholic, horror,...)
- illogical (proportions, placement,...)
- unexpected (juxtapositions, combinations,...)
- absurdity
- element of surprise
- liberate imagination
At the top of this post are a couple of books for reference.
Other references you could find with the works of Salvador Dali (paintings), Rene Magritte (paintings), Alessandro Bavari, Maggie Taylor, and Domen Lombergar among others.
To see how DI has helped many ads visualize what they really want to communicate photographically, surf on to:
- Top 50 Shockvertisements - Controversial Ads (SUPER GALLERY)
- The Arab Aquarius blog
Digital Creative Jeffrey Sebastian Lecture
 Visiting Lecturer Jeffrey Sebastian (2003 graduate of Petra's Visual Communication Design major /DKV'99), who's currently a digital creative freelancer, gave a showcase of his works yesterday in class, and revealed a recent project and case study from client Star Mild's ad agency. You can see his resume and some of his works on his site at creativetrees.com.
This will be followed later this semester by a three-day Digital Imaging seminar and workshop scheduled in the end of May. The event will bring in some of the top photographers and digital creatives from Jakarta to explain and demonstrate to us about the DI industry and also the whole process from planning to execution. The seminar will be open to the whole Visual Communication Design department. The 2-day-workshop, however, will be limited to the XP Class.
Wednesday, April 2, 2008
Fake InfraRed Photography: If you can't afford to Make one, Fake one
Not exactly a true IR, but it gives you a similar feel. Give it a try.
Alignment in Photomatix
I've found that Photomatix’s alignment wont work properly in itself. This means that the option below it, which is “Attempt to reduce ghosting artifacts” must always be checked also to get the best result. Like so...
Here is an example of alignment WITHOUT the Attempt to reduce ghosting artifacts:

 You can see above at the HDR viewer window that the alignment isn't perfect.
And here's WITH the ATTEMPT TO REDUCE GHOSTING ARTIFACTS on:

 Here the alignment is much better.
Here are just a couple examples of HDR results. The first one is merged into HDR & Tonemapped in Photomatix, Photomerged/Stitched & finalized in Photoshop. The second is fully done in Photoshop.


Tuesday, March 25, 2008
Photo Journal/Exercise 6 (Photo-DI): High Dynamic Range (HDR) Photography
High
It is closer or even higher than the dynamic range of the human eyes, where for a digital camera can only capture a third of our dynamic range in a single shot. The result image of a HDR photo in general looks very sharp with long depth of field, clearly detailed in the darkest to lightest areas, and has a wider range of colors, often resembling to contemporary hyperrealistic paintings. It seems “more real” than reality. Even though it is close to our eyes’ dynamic range, HDR photo somehow seems to show an “enhanced” reality or a clearer reality. This is the purpose of the exercise, which is to show such capabilities in digital photography and imaging, and how you can explore such hyperrealism. This is truly an experiment that has been impossible to capture using only traditional photographic methods. Approximate exposure ranges of photographic capture and storage media. From top to bottom: Finished Print, Computer Monitor, Transparency Film, Digital Camera, Negative Film, Normal Human Vision, HDR Image.
For examples of HDR photos, you can go to Flickr and type in "HDR", or click here, or join one of the HDR groups.
HDR photos are multi-exposure blended photos taken at a constant aperture setting with different shutter speeds and then blended into High Dynamic Range images with either Photoshop or another great program specially made for HDR called Photomatix. You can download the free trial here.
After generating your HDR composite, there is a process called Tone Mapping, where you are converting from a 32-bit image into a lower 16-bit or 8-bit image, this can be done also in Photoshop or in Photomatix.
Now, instead of rewriting or RSS feeding the full techniques here, I'll give you some links that are very good in giving directions on how to make HDR photos:
- How to Create Professional HDR Images
- The Definitive Guide to Realistic High Dynamic Range Images
- Modern HDR photography, a how-to or Saturday morning relaxation (has a complete explanation about HDRi)
- HDR Tutorial: How to create ‘High Dynamic Range’ images using Photomatix
The exercise is to create your HDR photograph by using 3 or more exposures. Try 5 or even 7. You could either use Photoshop or Photomatix-and-Photoshop. Any software you like.
Turn in and show your multiple exposures and your final HDR photo result.
FULL BONUS POINTS IF YOU COULD ALSO EXPERIMENT AND MAKE A STITCHED or PANORAMIC or 360 HDR!!!
Take a peek at:
- www.360icon.com
- www.panoguide.com
- High Impact Photography with Panoramics
Monday, March 24, 2008
Photo Journal/Exercise 5 (DI): RESTORATION
Old family photographs are such precious artifacts. Going through my father's bookcase I found an old album containing old photographs of my late great grandfather's family. My father only remembers his grandfather and grandmother in these pictures, other members he can barely remember. These photographs carry such interesting clues to the past ways of life, especially about the Chinese Indonesian families during the early 1900's. Note that the men in these pictures wear European (Dutch) style suits, whereas the women wear traditional Javanese dresses. And there's a plant sticking out in the middle of the picture that might be seen as funny. Why didn't they just move it and replant it after taking the picture? But I think it can also be seen as respectful towards all living things, including plants. "Let it be in the picture with us" :)
 This is the first digital imaging exercise for the XP class, when we start to shift modes from being a photographer to being a photoshoper :) . There's something interesting also about utilizing modern digital technology, for something old and has a timeless value. With this Restoration exercise, we are utilizing most of the tools used for adjustments and retouching in Photoshop. It is a complex artform in itself. But it is a good exercise to be able to dive into DI quickly, and at the same time making something positive out of it for your family. You could even make it into your personal/family project.
 So... the exercise is to restore one of your own family's old photo to its probable original crisp condition, whether in B&W or Color.
Then create 2 versions from it: 1 GOOD B&W PHOTO & 1 GOOD COLOR PHOTO.
- If you have a B&W PHOTO, you need to color it (use the Color blending mode in the Layer panel; using a mousepen would probably be better).
- If you have a COLOR PHOTO, you only need to create a B&W version after you've reconstructed the color to a "proper" condition (use Channel Mixer).
Some more rules & tips:
- Make sure the photo is from your own family/relative or your close friend. Stay away from copyrighted photos.
- Choose a photo that needs restoring the most (like the second photo seen above).
- Remember about non-destructive editing. Keep your original scan on the background layer. Use MANY Adjustment Layers & Maskings to edit selectively (for example Curves adjustment just for the needed areas, and cover the rest that don't need it with masking). Also remember that you can CLIP your Adjustment Layers just for a specific Layer without affecting other Layers below it.
To turn in with a CD:
- Save your original PSD file(s) with the complete layers.
- Save a copy also for each of your BEFORE & AFTER pictures to medium JPEG's for fast review. (1 Before photo, & 2 After photos: in B&W & Color).
You can go to digitalretouch.org for some references.
Wednesday, January 9, 2008
Subscribe to:
Comment Feed (RSS)


